How to Build a Low-Latency IoT App with ScyllaDB and Node.js
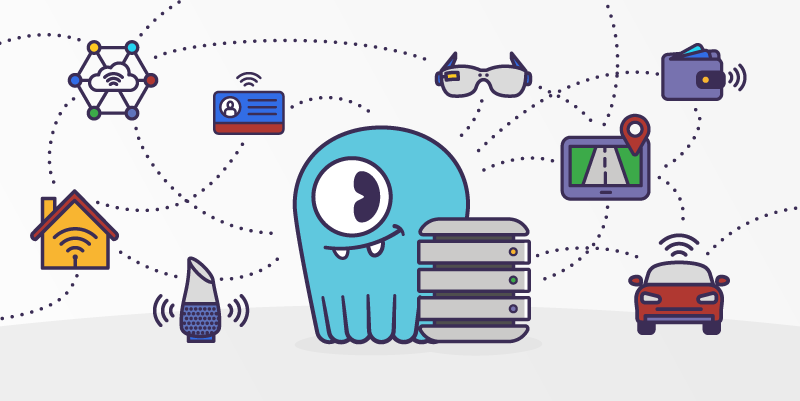
In this tutorial, you will learn how to l build an IoT sensor simulator application that streams data to a ScyllaDB cluster hosted on ScyllaDB Cloud.
Low Latency Requirements
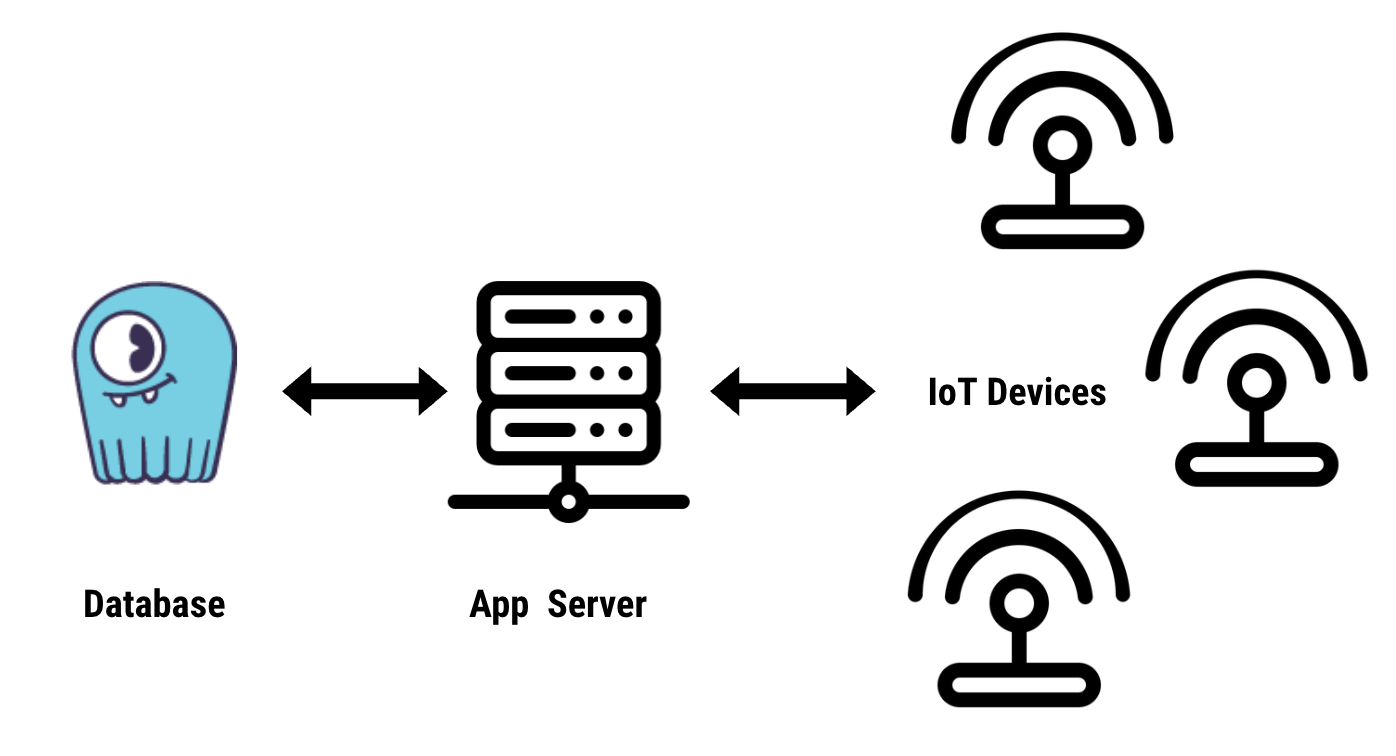
In general, latency refers to the time it takes for data to be processed, written, or read. Imagine a sensor sending data to a database connected to another server that reads the data through HTTP in an IoT use case.
There are two different classes of latency when you are designing an IoT application. The first is end-to-end latency, usually a full round trip time (RTT) from the IoT device itself, up into your application (and database), and then back to the IoT device itself. This often depends on your geographical (real-world) topology, and the kind of networking and computing hardware you are using.
Achieving lower end-to-end latency may require improving the form of network connectivity (say, shifting from 4G to 5G infrastructure), upgrading IoT sensor packages, hardware tuning, and other elements out of control of a backend app developer. So we’ll leave those aside for now.
The second are latencies within the application or even within the database itself. At ScyllaDB we are particularly concerned about optimizing the latter. How long does your database take to internally process updates or queries, especially when real-time IoT devices may be depending on the reply before responding to users, or changing their state or behavior?
Achieving lower latency within such an application requires decreasing processing and IO times across the server and the database behind it. Let’s go through that exercise and imagine a chocolate factory with thousands of devices measuring and recording fifty critical data points per second.
Does it Matter?
Not every performance gain is worth the investment. You’ll need to know your system’s requirements and constraints and ask yourself questions such as:
- How often is data recorded?
- How critical is it?
- In case of a production failure, what’s the tolerated response time?
For example, my chocolate factory might not need real-time data. In this case, we can decrease the sampling rate — the measurement’s polling frequency. Do I need to check every device every second? Every five seconds? Every minute? Longer? By backing off the sampling rate, I may lose “real time” understanding, but may greatly decrease the amount of data ingestion. Or perhaps I can batch up all the local samples — the device might poll every second, but will only send a batch update every minute to the server, decreasing the number of operations by 60x, but increasing the size of the payload by the same rate. Thus, if I have moved the polling time to one minute, doing a lot of work to improve a sensors’ processing capability over thousands of devices for a 100µs gain might not be the highest priority.
That long polling time might be appropriate for, say, a machine health algorithm. But what if I need my IoT system for actual manufacturing device controls? In that case, the application may need millisecond-scale or even sub-millisecond response times. Or who knows how many chocolates I may ruin if the system takes a minute to respond to real-time changing conditions on the manufacturing floor!
You need to design a system that is scoped and scaled to the specific workload you have.
IoT and ScyllaDB, a Match Made in Heaven
ScyllaDB provides highly available data and sub-millisecond writes, meeting the requirement to design an IoT system at scale.
ScyllaDB’s shard-per-core architecture allows queries to connect directly not just to the right node, but to the exact CPU that handles the data. This approach minimizes intracluster hops, as well as CPU-to-CPU communication.
Sensor Simulator
To populate the database, we created a sensor app that generates random data and pushes it to the database, thus simulating the sensor’s activity. We created the simulator in three steps:
- Create random sensors and random measures
- Connect to ScyllaDB
- Insert batch measures
The app runs indefinitely, creates data every second, and then sends a batch query to the database every 10 seconds.
Prerequisites:
Create Random Sensor and Measure Data
Let’s start by creating a new NodeJS project with the following commands:
mkdir sensor
cd sensor
npm init -y
npm install cassandra-driver casual dotenv
Create an index.js file and run the following commands:
mkdir src
touch src/index.js
Add the following code in index.js
function main() {
// Generate random sensors

// Generate random measurements
}

main();
In the package.json file, remove the “test” script and add the following:
"scripts": {

   "dev": "node src/index.js"
},
We can run the index.js primary function using npm run dev.
Add a new file named model.js in the src folder like this:
touch src/model.jsAs the name suggests, we define our model in model.js. Let’s first define the Sensor class.
We use the casual package to generate random data. Let’s install with the following command:
npm I casualAdd the code below to model.js:
// model.js
const casual = require('casual');

const SENSOR_TYPES = ['Temperature', 'Pulse', 'Location', 'Respiration'];

casual.define('sensor', function () {
  return {
    sensor_id: casual.uuid,
    type: casual.random_element(SENSOR_TYPES),
  };
});

class Sensor {
  constructor() {
    const { sensor_id, type } = casual.sensor;
    this.sensor_id = sensor_id;
    this.type = type;
  }
}

module.exports = { Sensor };
The casual.sensor function creates a random sensor_id and type provided in the SENSOR_TYPES array a new owner and generates random data using the casual library.
Let’s test this out by adding the below code to index.js:
cconst casual = require('casual');
const { Sensor } = require('./model');

function main() {
// Generate random sensors
const sensors = new Array(casual.integer(1, 4))
  .fill()
  .map(() => new Sensor());

// Save sensors
for (let sensor of sensors) {
  console.log(`New sensor # ${sensor.sensor_id}`);
}
// Generate random measurements
}
The next step is to create a function runSensorData that generates random measures. For that, we need to define two constants:
INTERVAL: the interval between two measures taken by the sensor.BUFFER_INTERVAL: the gap between two database insertions.
//index.js
// ...
const INTERVAL = 1000;
const BUFFER_INTERVAL = 5000;
We also need to import the moment package:
const moment = require('moment');The runSensorData function looks like the following:
function runSensorData(sensors) {
  while (true) {
    const measures = [];
    const last = moment();
    while (moment().diff(last) < BUFFER_INTERVAL) {
      await delay(INTERVAL);
      measures.push(
        ...sensors.map((sensor) => {
          const measure = new Measure(
            sensor.sensor_id,
            Date.now(),
            randomSensorData(sensor)
          );
          console.log(
            `New measure: sensor_id: ${measure.sensor_id} type: ${sensor.type} value: ${measure.value}`
          );
          return measure;
        })
      );
    }
  }
}
The code above creates a new measure using the Measure class and randomSensorData function and pushes it to the array.
The Measure class should look like this:
// model.js
class Measure {
  constructor(sensor_id, ts, value) {
    this.sensor_id = sensor_id;
    this.ts = ts;
    this.value = value;
  }
}
We’ll create a new file helpers.js and add the randomSensorData and delay:
// helpers.js
const casual = require('casual');

function randomSensorData(sensor) {
  switch (sensor.type) {
    case 'Temperature':
      return 101 + casual.integer(0, 10);
    case 'Pulse':
      return 101 + casual.integer(0, 40);
    case 'Location':
      return 35 + casual.integer(0, 5);
    case 'Respiration':
      return 10 * casual.random;
  }
}

function delay(time) {
  return new Promise((resolve) => setTimeout(resolve, time));
}

module.exports = { randomSensorData, delay };
Connect to the Database
You can create a free ScyllaDB Cloud account on https://cloud.scylladb.com. Follow this blog post to learn how to create a cluster.
Once the cluster is created, connect to your database using CQLSH:
docker run -it --rm --entrypoint cqlsh scylladb/scylla -u [USERNAME] -p [PASSWORD] [NODE_IP_ADDRESS]
Note that you will need to replace the USERNAME, PASSWORD, and NODE_IP_ADDRESS with your own.
Create a keyspace:
CREATE KEYSPACE iot WITH replication = {'class': 'NetworkTopologyStrategy', 'AWS_US_EAST_1' : 3} AND durable_writes = true;

Use iot

CREATE TABLE IF NOT EXISTS iot.sensor
(
  sensor_id UUID,
  type TEXT,
  PRIMARY KEY (sensor_id)
);

CREATE TABLE IF NOT EXISTS iot.measurement
(
  sensor_id UUID,
  ts    TIMESTAMP,
  value FLOAT,
  PRIMARY KEY (sensor_id, ts)
) WITH compaction = { 'class' : 'TimeWindowCompactionStrategy' };
Let’s create a getClient function that returns an Apache Cassandra client. NODE_1 represents the IP address of one of the nodes. ScyllaDB Cloud is a distributed database that runs with a minimum of three nodes.
const cassandra = require('cassandra-driver');
require('dotenv').config();

const { NODE_1, USERNAME, PASSWORD, DATA_CENTER, KEYSPACE } = process.env;

function getClient() {
  const client = new cassandra.Client({
    contactPoints: [NODE_1],
    authProvider: new cassandra.auth.PlainTextAuthProvider(USERNAME, PASSWORD),
    localDataCenter: DATA_CENTER,
    keyspace: KEYSPACE,
  });

  return client;
}

function insertQuery(table) {
  const tableName = table.tableName;
  const values = table.columns.map(() => '?').join(', ');
  const fields = table.columns.join(', ');
  return `INSERT INTO ${tableName} (${fields}) VALUES (${values})`;
}

module.exports = { getClient, insertQuery };
We also added an insertQuery function that will help insert data to the tables. For that to work, we need to add to getters in the Sensor and Measure classes:
class Sensor {
// ...
  static get tableName() {
    return 'sensor';
  }

  static get columns() {
    return ['sensor_id', 'type'];
  }
}

class Measure {
// ...
  static get tableName() {
    return 'measurement';
  }

  static get columns() {
    return ['sensor_id', 'ts', 'value'];
  }
}
Let’s add getClient function to index.js, add the sensors to the database:
async function main() {
  // Create a session and connect to the database
  const client = getClient();
  // Generate random owner, pet and sensors
// ...
    .fill()
    .map(() => new Sensor());

  // Save sensors
  for (let sensor of sensors) {
    await client.execute(insertQuery(Sensor), sensor, { prepare: true });
    console.log(`New sensor # ${sensor.sensor_id}`);
  }
  // Generate random measurements
  await runSensorData(client, sensors);

  return client;
}
Insert batch measures
We use batch to avoid inserting data after every measure. Instead, we push the measures to an array and then create a batch query that we execute using the client.batch function.
async function runSensorData(client, sensors) {
  while (true) {
    // ...

    console.log('Pushing data');

    const batch = measures.map((measure) => ({
      query: insertQuery(Measure),
      params: measure,
    }));

    await client.batch(batch, { prepare: true });
  }
}
Conclusion
In this post, you saw how to create a sensor simulator that generates random data and sends it to the database. We created a ScyllaDB Cloud cluster and a keyspace, connected to it, then ran batch queries to insert the data.
I hope you find this post interesting. If you’d like to learn more about ScyllaDB, I highly recommend getting an account in ScyllaDB University. It’s completely free and all online. Let me know in the comments if you have any suggestions.